Preparing the Pad
Cleaning Out the Stitches
[avia_table]
 |
Pull out all of the stitches that were previously cut in order to remove the pad from the arches. |
[/avia_table]
Reshaping the Pad
[avia_table]
 |
During this section, you will be reshaping the padding from the shape on the left to the shape on the right. |
  |
The red areas on the pad in the pictures above represent the areas that need to be removed in order to make the pad much more movie-accurate. Your pad will may have this area on both the front and the back, or only on one side. |
 |
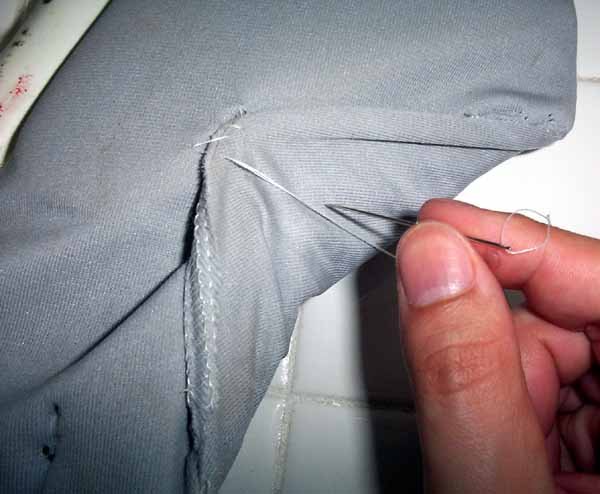
Start by cutting the stitching on the inside edge of the area. Remove the thread. |
 |
Cut along the seam of the pad to expose the area. |
 |
Cut the area off of the pad with scissors. Make sure you don’t cut any of the fabric. |
 |
Once the area is cut off, there will be a small pointy protrusion left over at the bottom end. Trim this off to smooth out the features. You can see the small piece I trimmed off in the picture above. |
 |
Take all of the excess fabric and sew it back snuggly with your needle and thread. |
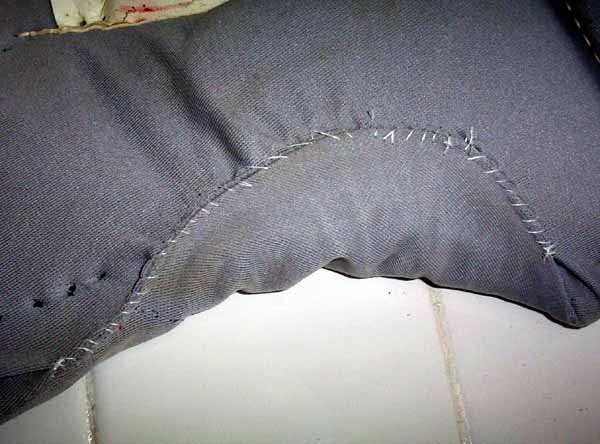 |
The finished stitching should look something like this. |
 |
The pad should now look like this. |
 |
And now for the bottom front edge. As you can see, the pad here has an asymmetrical rounded appearance. In order to achieve the squared look from the movie, we must open the the bottom seam and trim off everything below the red line. |
 |
Once the padding has been trimmed, the excess fabric is sewn back. The front bottom edge should look like this. You are now done reshaping the pad. |
[/avia_table]
Replacing the Stitches
[avia_table]
 |
Using your crochet thread and large needle, put thread back into the thread holes. Start at one end, weave through the holes to the other end, and then weave back in the opposite way. This will ensure that there is a stitch in between every hole. |
 |
Do the same for both the front and the back. |
[/avia_table]
Painting the Pad
[avia_table]
 |
Take your matte clear paint and thoroughly paint the vinyl cushion (the collar area). Once that is dry, paint the whole pad in flat black. Make sure you spray the pad from every direction in order to permeate the texture of the fabric, and to get under the edges of the vinyl. |
[/avia_table]
Page 1 | Page 2 | Page 3 | Page 4 | Page 5 | Page 6 | Page 7