Brace yourselves.
This is a VERY detailed guide to creating a screen accurate version of the leg brace worn by Mel Gibson in Mad Max 2 / The Road Warrior.
INTRODUCTION
I made my first Mad Max 2 costume a few years ago for Halloween. I threw it together in a about two weeks at a cost of a couple hundred bucks. It wasn’t totally accurate, but it was decent and it was at least obvious what character I was supposed to be. Around that time, I met Karol of madmaxcostumes.com. I think I can say with some confidence that he is the world’s leading Mad Max costume expert (aside from the original film’s costume designer Norma Moriceau). Given that Karol lived only about thirty minutes from me and was willing to lend a hand, I decided to embark on my ultimate costume project – A screen accurate Mad Max 2 (MM2) costume.
I’ve named it “The Replica Warrior”.
To the best of our knowledge, a re-creation of this particular outfit has not been done with this level of accuracy before. In fact, just a few years ago it would not have been possible. It was not until the film was released in HD that the amount of detail required was revealed. (And I am indebted to “Springleaf” for providing me with dozens of HD screenshots).
With Karol’s help, this project is now nearing completion. In the end, it will have been a multi-year, multi-thousand dollar effort. I’d like to just quickly thank some others that have helped with what turned into a global research project / scavenger hunt. Mr. A.K. (I’ll use his initials in case he wants to remain anonymous) who had the most accurate MM2 costume I’d seen and made me realize this was possible. Also Jim M, and Dave “Humvee Driver”, and everyone else on the madmaxmovies.com costume forum. Between my own research and the help of all of those people, I have been fortunate to accumulate a vast amount of knowledge about this particular costume and I want to share that with others.
Rather than wait until the project is 100% complete, I’m going to start putting out my info a little at a time. The entire guide to the entire costume should be available sometime this year. For now, I’m going to be putting out guides to separate parts of the costume, one part at a time.
ABOUT SCREEN ACCURACY
Screen accurate (sometimes abbreviated SA) is the goal of many movie costume re-creators. But I don’t believe it is something that can ever be 100% achieved. First of all, even if you had the actual screen worn costume that was used in the film, it may not be in the same condition as it was during filming. And it may not fit you exactly the way it fit the original actor (it may not even fit them properly anymore). Because after all, we’re not talking about just accuracy, we’re talking about screen accuracy. How it looked up on the big screen, with all of the proper lighting on it etc.. Secondly, many movie costumes (Max’s included) go through different incarnations in a film. Sometimes they are damaged throughout the story, sometimes a continuity error causes part of the costume to be missing in certain shots (watch for Max’s disappearing and reappearing knee pad) and sometimes the hero will be replaced by a stunt man who is wearing a slightly different version of the outfit. Which of these costumes are screen accurate? They all are. Because they all appeared on screen in the movie.
(One example of this in the Mad Max world is the “post crash” version of Max. Some costumers do this version, which is how Max appeared later in the movie, with bandages on his arm and leg, and his knee pad and some other accessories gone.)
So even though there is no such thing as total screen accuracy, it’s my goal to get as close as possible, sparing no amount of effort and (almost) no amount of money.
For my purposes, I wanted a screen accurate version of what I consider Max’s most iconic version of the outfit. This is the version he wears early in the film, with all of the accessories, including his binoculars (which don’t appear after about twenty minutes into the film). This is the version of the costume that includes a red rag tied to Max’s shoulder, and is generally the most popular with fans.
ONTO THE BRACE:
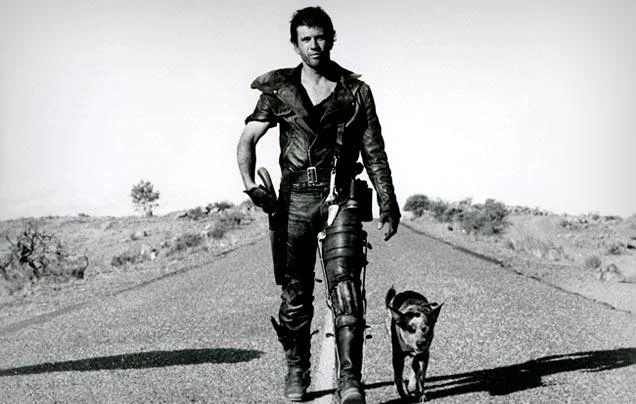
Story-wise, Max wears a leg brace in film two because of the injuries to his leg that he sustained in film one. The brace, like many of the costumes and props in film two, was made to look like it was assembled from whatever pieces Max could scrounge in the wasteland.
The brace consists of two main parts – a pair of tailgate hinges and an orthotic ankle brace. These are held on with various bits of hardware and two leather straps (as well as a third leather strap built in to the ankle brace).
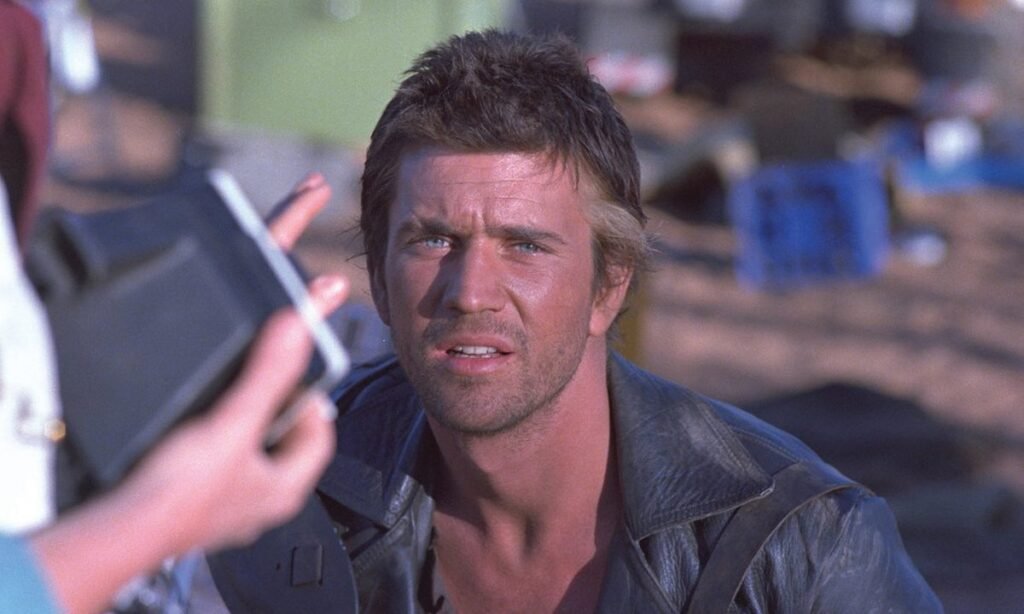
Here is a screenshot of Max wearing the brace.
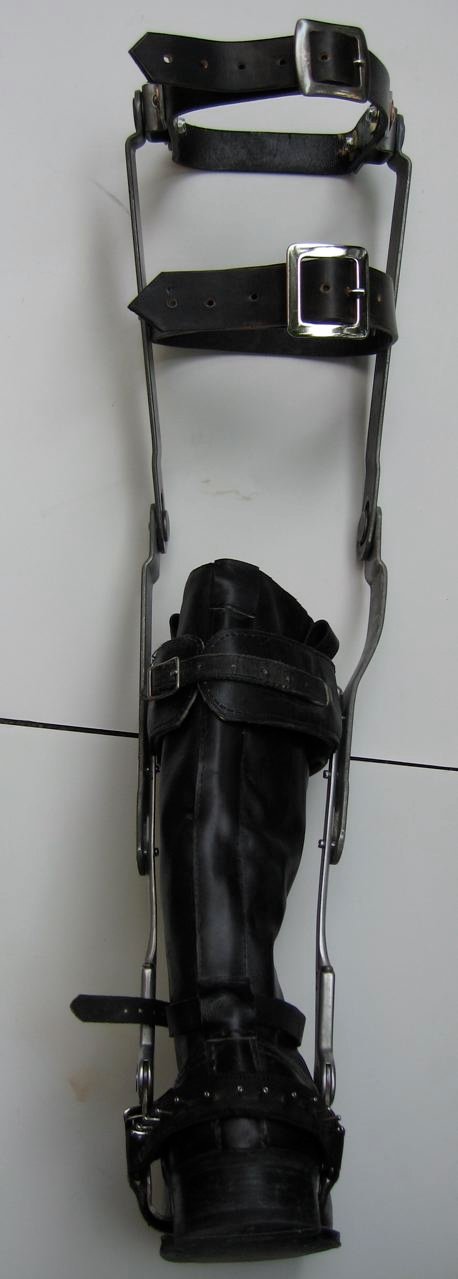
Here’s a photo of my brace:
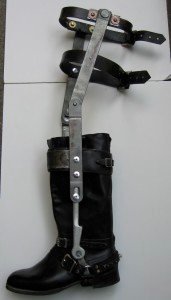
The brace is complete, but the boot still needs some weathering. The boots are their own topic and will be discussed another time. (Boot thread has now been posted here: How to make Max’s boots – please search for the page until we get the links back up) Also, the knee pad Max is wearing in the black and white photo at the top is not connected to the leg brace and will not be discussed here. That knee pad will be the subject of another guide.
THE TAILGATE HINGES:
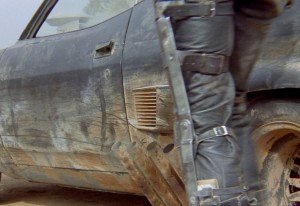
The hinges used to make Max’s brace are Australian equivalent to 1967-1979 US Ford F-series pick-up tailgate hinges. (Be sure not confuse the F-series hinges with the 1966-1977 Bronco hinges: they are different). Tailgate hinges can be found at junkyards (you will need a large philips screwdriver and a 1/2″ socket wrench to pull them). Used ones sometimes show up cheap on eBay.
Here is a photo of one of the hinges:

THE ANKLE / AFO BRACE:
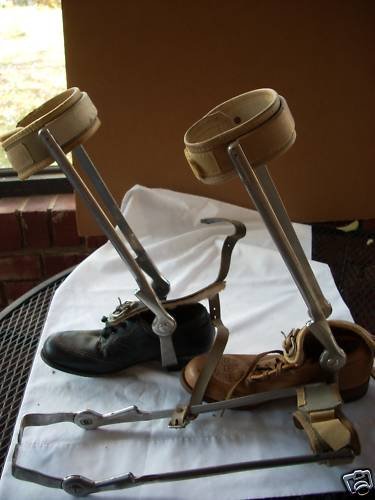
Attached to the bottom of the tailgate hinges is a vintage metal and leather ankle brace sometimes known as an AFO (“ankle foot orthosis”) brace. This type is rarely used anymore and your best chance at finding one is on eBay.
These braces come in many styles, but here is a photo of some that are nearly the exact same style that Max wears.
Tips on finding an AFO brace:
This can be one of the most difficult and most expensive components of an MM2 costume to obtain. I eventually found mine at a medical prosthesis company, right before they went out of business (thanks for the recommendation Mr. A.K.). Most of these places no longer sell these types of vintage braces, only the modern plastic ones. I kept stopping at places that sold wheelchairs, crutches, fake legs, that sort of thing, and asked if they had any vintage metal and leather ankle/foot braces in the back. One place finally did.
Be aware, they may be reluctant to sell you you if they think it’s for actual medical purposes, as these things need to be supervised by a doctor and fitted properly and aren’t really used anymore. I told the store that I only needed it for theatrical and photography purposes and then they were okay with it. I managed to get it for $40.
You can try eBay, (and a few people have gotten lucky that way) but eBay is a tough place to buy AFO braces. Why? Because there is a dedicated group of perverts out there that are really into taking semi-naked pictures of girls with leg and ankle braces on. And no one spends more money than perverts. I discovered this little subset of sex culture after getting outbid on one AFO after another (they would sometimes go for hundreds of dollars). Finally, I did some google image searches for different types of braces and stumbled onto their “Betty Page with polio” obsession. Let’s move on.
Choosing whether or not to permanently attach the AFO brace to the boot:
For their intended medical purpose, AFO braces are meant to attach to the shoe. Slippage is not something you want when you’re trying to help someone walk correctly. The type of afo brace that has a split stirrup, or even sometimes what looks like a straight stirrup (because a plate has been removed or not attached yet) can be just passed in front of the heel, but for medical purposes it would always be attached. (this is re: vintage braces like Max’s of course, modern ones are totally different)
From the HD screenshots I’ve looked at, it is unclear whether or not Mel Gibson’s AFO brace was ever actually attached to his boot. The straps on his boots cover the bottom of it most of the time. The only time we see the bottom of his boots is when he’s crawling away from the car wreck and about to be picked up by the gyrocopter. But it’s unclear in those shots, all you can see are the straps from his boot harnesses.
There is one shot however, the closeup of his boots when he starts up the rig, that seems to show that the brace is simply passed underneath his boot, and not attached at all. It passes under the boot around the same area where the boot harness strap goes, so it’s hard to get a look at. They might have left it unattached to make it easier to get everything on and off, or to keep the brace from interfering too much with Mel’s movement (after all, these braces are meant to change the way your foot moves, if you have what’s called a “drop foot” for example – and it might be frustrating to walk with one if you don’t actually have any physical problems).
I know someone who chose not to attach the brace to the boot because he liked the boots so much that he wanted to be able to wear them sometimes without the costume, and having an AFO brace permanently attached would have made that impossible.
As for the boot brace on my costume, I had it permanently attached to my boot. It keeps things in place better when I walk around. Most AFO braces have a metal plate at the bottom that is hammered in at the top of the heel, or in between layers of the heel. Something that can be done at most shoe repair places. (But just note that Max wears his AFO brace backwards, more on that below).
BUILDING THE LEG BRACE:
The first thing you’ll want to do is to put a bend in the tailgate hinge that will be on the inside of your left leg. Not only is this more screen accurate, it’s more comfortable as it creates a bit more room for your knee. I wore the brace without the bend for a while and the bend made it much better.
To bend it, I simply put the hinge in a vise and pulled (hard). Then I moved the hinge a little and bent it back again a little farther up, creating the double bend.
Here is a screen capture from the movie of the bend I’m talking about, and then a picture of my brace:

You may notice that my bend is a bit too low. That’s because I made the mistake of assembling this brace before I made the bend (I didn’t have access to a vise at the time). That meant that when it came time to put the bend in, I had to be careful not to damage the attached AFO brace or pop out the rivets. That’s why I’m recommending you do the bend as a first step.
PREPPING THE AFO BRACE
Chances are, your AFO brace will come attached to a shoe that you’ll have to tear off (and they can be on there pretty good). In my experience, the only difference in a left or right AFO brace is the shoe attached to the bottom of it, so once you get the shoe off it shouldn’t matter.
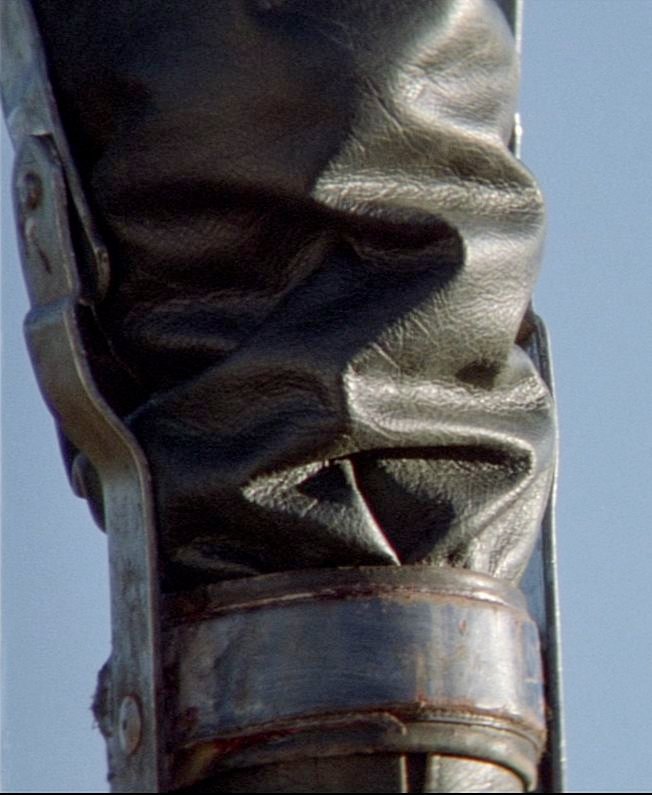
Max wears his AFO brace backwards. At the top of his brace you can see a wide metal curved band across his shin. The brace was originally designed to have this curved piece at the back of the calf. Some AFO braces will have this curved metal plate exposed, like Max’s, but mine was encased in leather. I simply cut a layer of leather away to expose it.
You’ll need to drill three holes in each side of the AFO’s support rods. This is where it will attach to the tailgate hinges. You’ll want to put your boot on, put the AFO brace on your boot, then hold the hinges in place and see where everything is going to line up on your leg (and to make sure the hinge in the tailgate hinges lines up in the vicinity of your knee, otherwise, this thing ain’t going to bend right when you walk). The lowest hole drilled on the AFO will be lined at the bottom of the existing hole in the tailgate hinge, the top drilled hole will line up at about the middle of the top of the AFO brace, and the middle hole in between those. See this photo of my brace for reference.

These three holes will be for 3/16″ pop rivets (more on those below). The drill bit you use should be just a bit larger than 3/16″ (otherwise it can be difficult to get the pop rivet into the hole). The AFO brace is tough to drill through, but I managed to do it with a cordless drill and a drill bit made for metal. I did have to really put my weight on top of the drill though.
Another thing you MAY have to do to prep the AFO brace: These braces are meant to be adjusted for tension depending on the needs of the patient’s foot. Since I don’t actually have a problem with my foot I wanted as little tension as possible. There are two screws on the back protrusion of the bottom of my style of brace. In removing these, I was able to pull out the springs that were there for tension. Your brace may or may not have this.
PREPPING THE HINGES
You will need to drill three holes in each of your tailgate hinges. These will be the same size holes as you have in the AFO brace. The first two holes will line up with the top two holes of the AFO brace, and the third hold will be on the upper part of the hinge and will be for attaching the first of two leather straps/belts.
HARDWARE / ATTACHING EVERYTHING:
The hardware used to put Max’s brace together was revealed in this rare on-set photo. Here it is, along with a detailed blowup of the hardware in question:
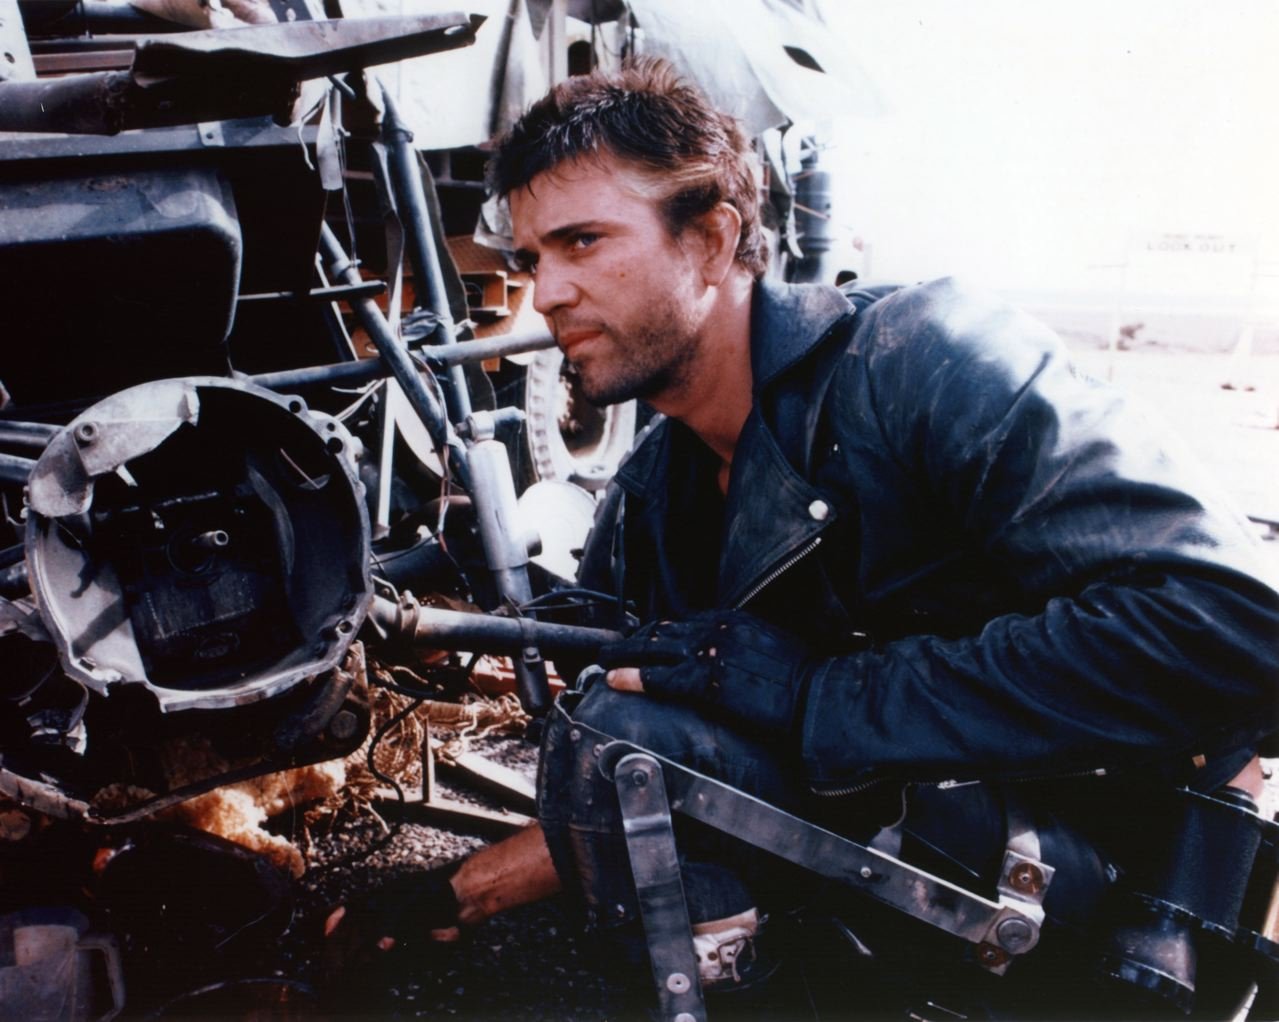

The large flat silver discs at the bottom of the brace (that attach the AFO) are the flange side of large flange pop rivets. The middle leather strap is also attached with pop rivets, only these pop rivets are done the opposite way, with the flange to the inside. The top leather strap is attached with what appear to be rounded hex head screws and copper washers.
I looked everywhere for pop rivets with a very large flange. The biggest I was able to find are still a tiny bit too small to be 100% screen accurate, so if some better ones are found in the future I’ll redo them, but for now this is very close. The pop rivets I used were 3/16 long aluminum large flange rivets from the Arrow Fastener company. (www.arrowfastener.com). I bought them at OSH hardware and the barcode is 79055 00888.
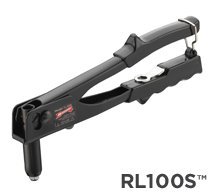
You’ll need a rivet tool to attach them. It looks like this:
So, put the bottom three rivets in, flange side out, and now your AFO brace is attached.
LEATHER STRAPS
Max has two leather belts or straps holding the brace to his thigh. Because we know the size of the tailgate hinge we can deduce that the upper strap should be about 1″ wide or possibly 1 1/4″ (mine is 1 1/4″ because that’s what I had around).
The lower strap is wider. Mine is 1 1/2″, but I think it might be just a bit too skinny so I may replace it with one that is 1 3/4″.
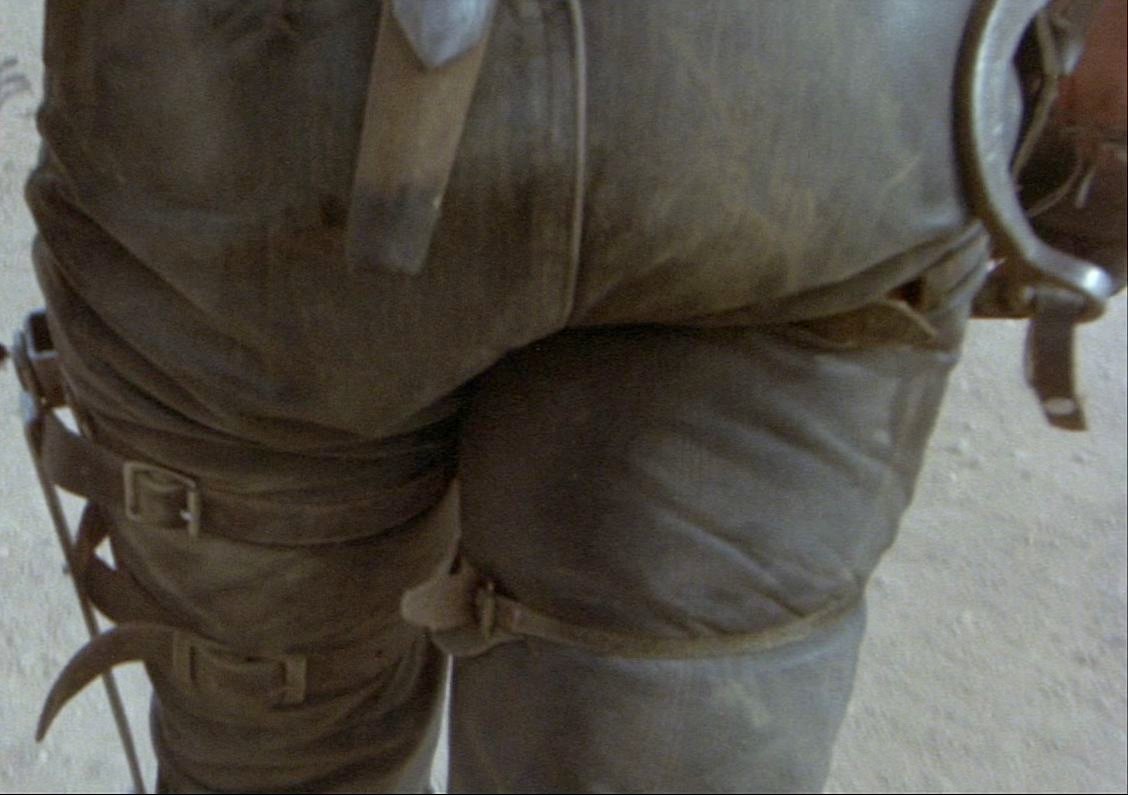
The buckles on these straps are both different and I haven’t been able to find ones that are exactly right, so you’ll likely have to make do with something that’s not 100% SA. But both buckles should at least be what’s known as the “center bar” type. If you build these belts like I did, be sure to leave plenty of extra length. After the end comes through the buckle there should still be a few inches so that the end of the belt can hang loose. See this screenshot:
I made my own straps from belt blanks I got from Tandy leather, but you can make do with some old leather belts if you want. However, be aware that these leather straps will be subjected to a lot of wear and tear and cheap or thin leather is likely to break.
If you use new leather like I did, I recommend getting the tan colored leather and dying it black yourself with some cheap black leather dye. Why? Because it’s easier to weather that way. You see, black leather that is professionally dyed will often be black through and through. Many of Max’s leather items are black, but show brown or tan where they are weathered and worn. To easily create this look, I used some inexpensive leather shoe dye (Kiwi brand, I found it in the shoe section at Walmart) and applied it. It doesn’t apply very well, but that’s good, because it gives you an uneven, weathered looking black color. In addition, since this dye is not saturated and covered with a protective coating like a store bought black leather product would be, it’s easy to remove the dye in key places with just a swipe of acetone. It gives a really nice weathered look without damaging the leather the way something like sandpaper would.
As a side note, if you want a cheap small bottle of acetone, just get some nail polish remover at your local drugstore. Just make sure it’s the type that has acetone in it.
To attach the bottom (thicker) leather strap, punch two holes in the leather, line them up with the holes you already have in the hinges and put a pop rivet through each one (this time keeping the flange on the inside so that only the small end of the pop rivet is visible. You’ll want to put the strap around your leg and hold the hinges up to it etc.. to make sure it all lines up properly with the holes in the hinges before you punch the leather.
You may want to do what I did and put washers on the inside of the leather strap. This will secure it better and there will be less chance of one of your rivets pulling through the leather.
Here’s what the pop rivet head attaching the strap looks like from outside the brace:

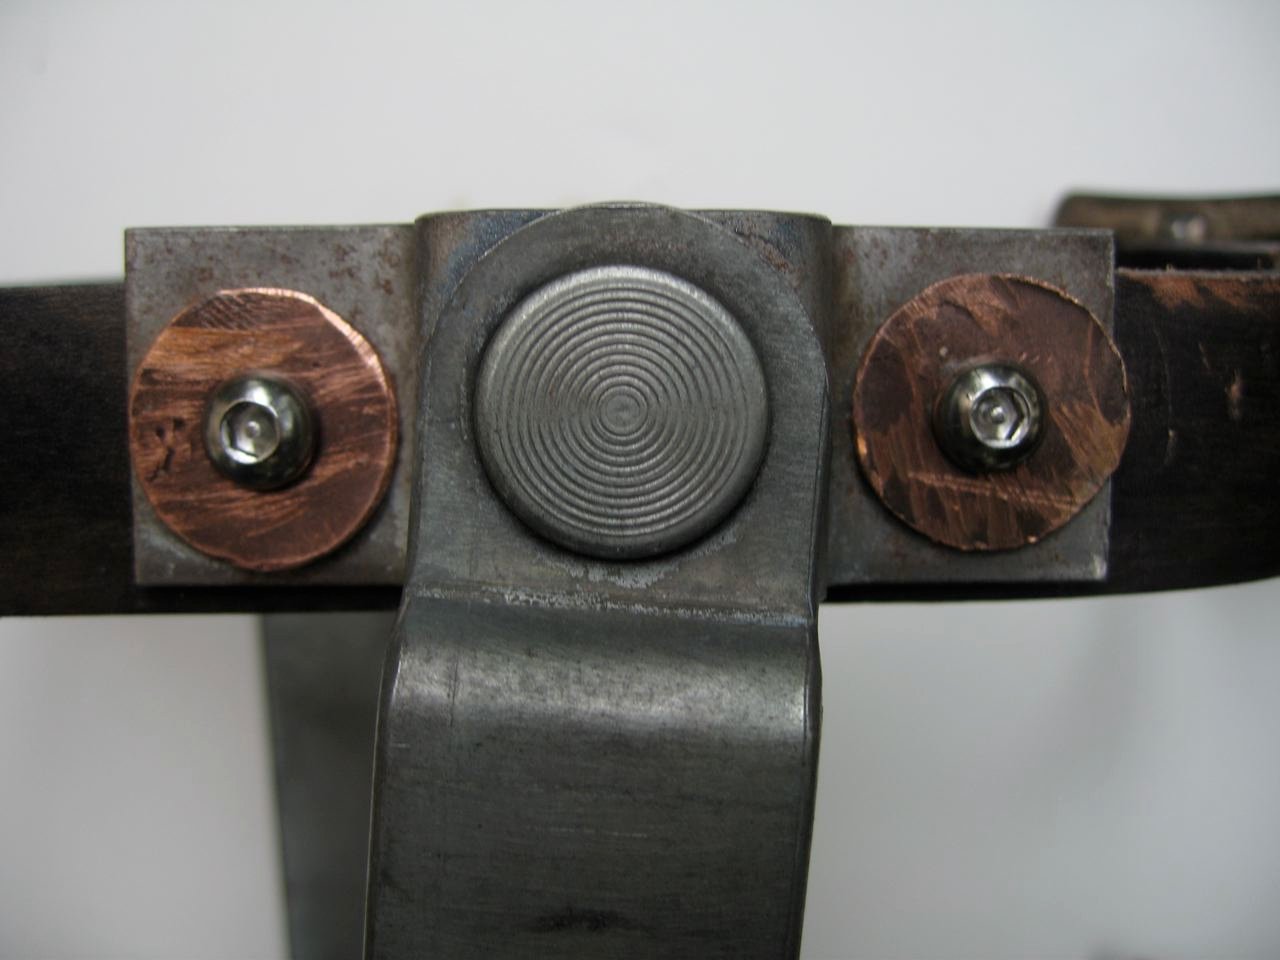
To attach the top strap, you’ll need to punch two holes on each side of the leather belt and line them up with the large pre-existing holes at the top of the hinges. For the four screws, I bought a license plate screw set at the automotive store. It came with four round hex head screws as well as the allen wrench needed to attach them.
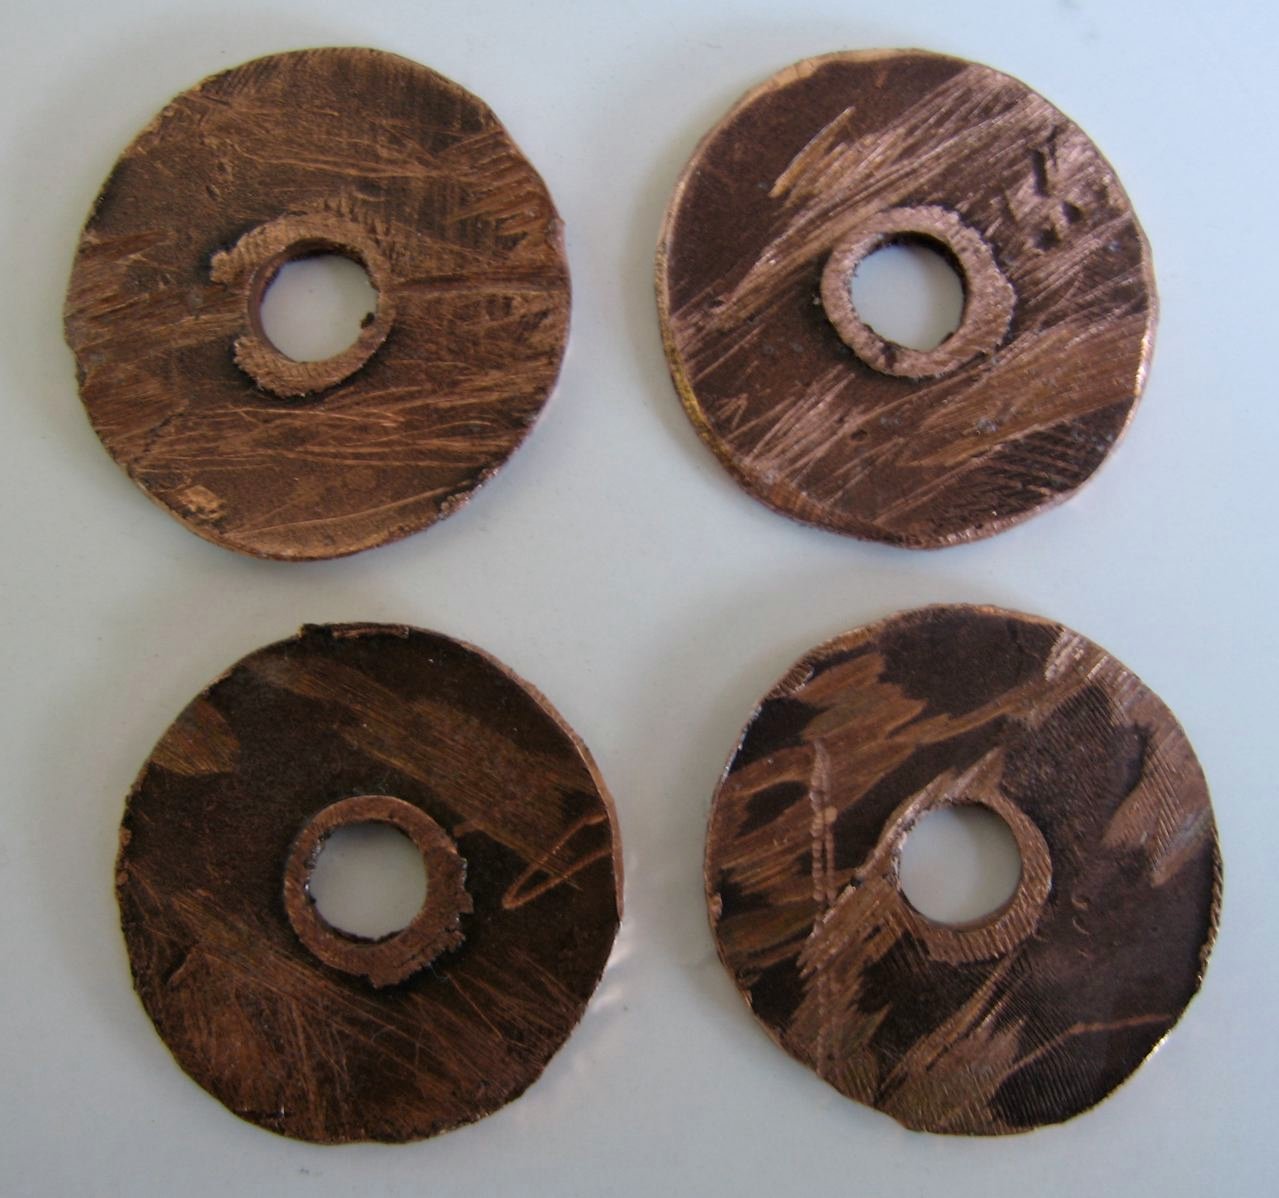
I looked everywhere for copper washers but couldn’t find any. So I made my own using a large old copper pipe and a 1″ hole saw (but you could use washers painted to look like copper or even incorrect brass or steel washers if you like). Since the pipe had a curve to it I had to hammer each washer flat. The copper had a nice patina to it and with a few scrapes ended up looking just like the ones Max had in the promo photo shown earlier.
Here is a closeup of my four homemade copper washers (approx 1″ or 2.5cm in diameter):
And how they look on the brace:
Once the hex head screws are in place, you’ll probably find (as I did) that the ends of the screws protrude past the end of the nut and dig into your leg. In that case, You’ll want to cut them off with a hacksaw so that the end of the screw is flush with the nut. I used a file to remove any barbs from the end of the cut screw so that my leather pants wouldn’t get scraped and torn.
Even though they won’t be seen, washers on the inside of the upper strap are a good idea (to decrease the chance of one of the screws pulling through the leather).
In this photo you can see the screws with the ends cut off, and the store bought brass washers on the inside.

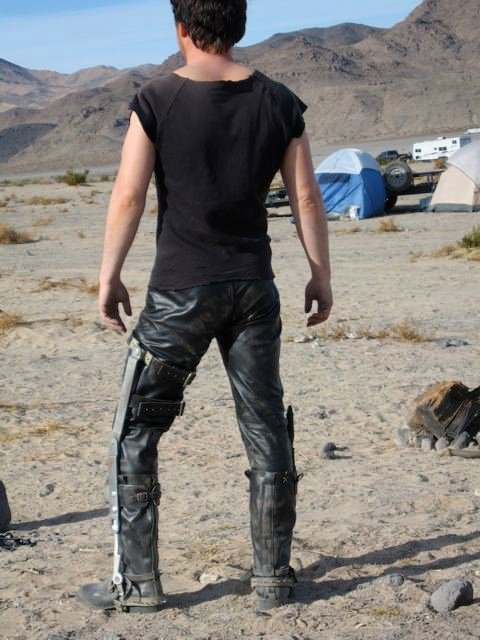
So that’s it. I still need to do a bit of weathering here and there, but I’m basically done with this brace. Here are some photos of me wearing it at Road Warrior Weekend 2009 (it wasn’t completely done in these pics, you’ll see that the ends of the two leather belts are still square and haven’t been cut yet, and there’s no bend in it yet.)

And here are two more views of the brace itself: