THIS IS A LONG AND DETAILED TUTORIAL FOR ACCURACY OBSESSED COSTUMERS ONLY.
Don’t say I didn’t warn you…
A little history:
The person who first figured out how to recreate a screen-accurate Mad Max shoulder pad was Karol B. His original tutorial is available here: How to Make Max’s Pad.
For convenience and consistency I’m going to use the same terminology to describe various parts of the shoulder pad that Karol used in his original tutorial. You can find a guide here: Football Shoulder Pads
Since that tutorial was written, Karol and I have worked off and on for about two years to create for me the world’s most obsessively accurate Road Warrior outfit. In doing so, we learned a lot of details about the costume (having access to the HD version of the movie helped a lot) and it is now time to update the shoulder pad tutorial.
The original tutorial is still correct and should still be looked at first, as these instructions are really meant to add on to it, not replace it. Not only have we learned some new information and techniques, but the world of Mad Max costuming has changed somewhat, especially as it relates to shoulder pads.
When Karol did his original tutorial, vintage Rawlings football pads of the correct type were fairly easy to come by. Not so anymore. They have become scarcer, and the prices have gone up (maybe an easy to follow tutorial for utilizing them in Mad Max costumes had something to do with it?) In addition, the pads needed are now (as of 2010) in the neighborhood of thirty years old. This is not a good thing for these pads. With age, the foam inside has a tendency to harden and become brittle, making them unsuitable for costume purposes. Also, many pads, either through use or improper storage, have mold or mildew problems in the arch padding (a problem that sometimes can’t be seen in eBay auction pictures and isn’t noticed until you have the item in hand). Finally, the vinyl strip covering the neck roll portion of the pad has a tendency to split and tear with age and use. For these reasons and others, we have decided to forgo the vintage padding and create our own, but more on that later.
USING VINTAGE PADS
We no longer recommend using vintage Rawlings pads in most cases (more about the new option a bit later on). If you do intend to track down vintage pads anyway, be aware of the problems noted earlier, and be sure to check Karol’s guides linked above so that you choose the right model number for your needs. Also, please pay special attention to the shoulder plate on the pad, regardless of the pad’s model number. Karol and I have started seeing numerous pairs of CP-46 and even ER-46 pads that have an incorrect shoulder plate on them. In fact, many pad pairs are being found with two plates that don’t even match each other, as if one has been replaced at some point. (As a side note, Karol was once pretty sure that Max’s original pad had been based off of a Rawlings ER-46 model because of a similar set he saw on eBay years back. But we’ve seen several of those recently and they haven’t looked right. So it’s hard to know if the one set of pads Karol saw was a standard ER-46 or not. I’m starting to think not.)
NOTE – Be sure that when you buy your shoulderpads they are not “youth” or “boys”-sized. These will be too small on the average man and won’t look right.
(And yes, I’ll take a moment to say that you can still make a great Mad Max costume without a 100% screen accurate pad and/or plate and most people won’t know the difference, but then why are you reading this? This tutorial is for people obsessed with an absurd level of screen accuracy. So let’s continue…)
For those of you who still intend to use a vintage pair of Rawlings pads as the basis for your pad, there are some tips we can offer above and beyond what is in the original tutorial.
The biggest problem with the pad assembly is that the rivets tend to start pulling through the foam padding or the leather after a while. We’ve done four things to help prevent this:
Pad strengthening tips:
1. To keep the rivet from pulling through the jacket’s leather, we use washers between the rivets and the leather on the inside of the jacket. You don’t need to do it for every rivet; about half of them will be plenty. Fender washers are recommended here since they are wide diameter washers have a small hole in the middle that the rivet can’t slip through.
2. To keep the rivet from pulling through the foam padding, we now attach strips of cotton to the foam using glue (a rubber cement like Barge brand is good for this). These strips of cloth go between the foam and the polyester fabric that covers it, so they’re hidden (to add these strips to a vintage pad you’ll need to cut the polyester open at the back and peel it away to attach the strips and then re-sew it once the glue is dry (do this at the back so the work can’t be seen obviously).
3. One other thing Karol came up with was burning the polyester covering of the pad at each of the rivet points with the tip of a soldering iron. Since the cloth covering the padding is polyester, the high heat melts it, creating a small ring of melted plastic around the rivet that won’t tear as easily. Note: this will only work with plastic-based synthetic fibers like nylon, polypropylene or polyester.
4. Yet one more idea Karol came up with to avoid rivet pull-through was using super glue. Once your rivets are in place, simply apply super glue all around the edge of the rivet head, allowing the glue to soak into the polyester covering behind it. Surprisingly, the cheap super glue we used did not leave a white crust – it simply absorbed. It’s hard for a rivet to pull through when it’s super-glued to the outer layer. You can try this on the leather side as well.
Painting:
Further to Karol’s tips on painting in his old tutorial, I can tell you that I have had good luck painting the vinyl neck roll and fabric of my pads with a brand of spray paint called Meltonian. It is meant for painting leather and vinyl and works very well. It comes in a variety of colors (you want black, obviously) and you may be able to find it where they sell shoe repair and leather crafting supplies, and you can get it on the internet.
Otherwise, the Rustoleum Painter’s Touch Matte Clear paint listed on Karol’s old tutorial is still the only other paint we’ve found that dries quickly, even after testing other Painter’s Touch colors.
MAKING A CUSTOM PAD
This is the method that we now believe results in the most screen accurate shoulder pad. If you’ve created a costume pad from the old tutorial, or even just read through it, you’ll know that to create Max’s pad from an existing Rawlings pad, some cutting and sewing of the arch padding needs to be done to create the correct shape. This was true with the more common CP-46 pad (though none of them are common any more) and it’s also true with the ER-46s we’ve seen recently and others. In fact, we have yet to see a shoulder pad in person that has arch padding that exactly matches what Mel Gibson has on in The Road Warrior. So rather than modify an existing vintage pad that doesn’t come out quite right, why not make your own from scratch? This also solves the problem of vintage padding that has become brittle or rotten.
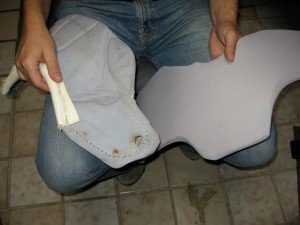
Old pad on the left. New pad on the right (unfinished).
First, you’ll want a piece of 3/8″ polyethylene high-density foam, sometimes referred to as L-200. You may need to get this from a specialty foam shop and buy a large sheet (we paid about $25). Most of the foam you find in the average fabric store will be too porous and spongy. You want something that will approximate the dense micro-pore foam they use in athletic equipment. Note: Some craft or fabric shops carry a similar “craft foam” but this is too dense, too thin, and usually comes in sizes too small to work with.
Using arch padding from vintage Rawlings pads and comparing it to screenshots of Max, Karol created what we believe is a very accurate shape that approximates Max’s pad.
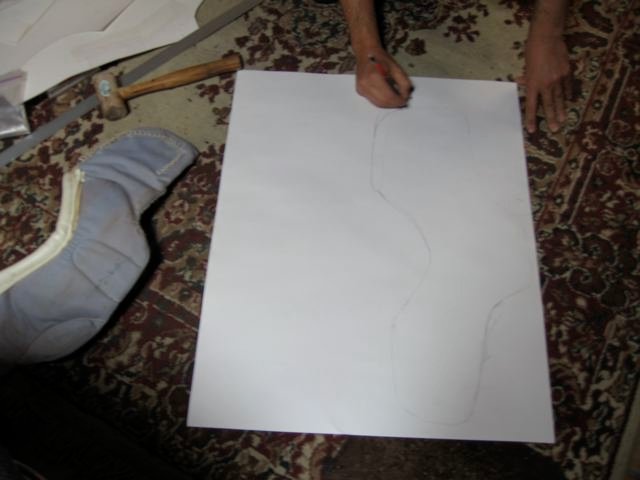
Karol drawing the template for the foam padding
Here are photos of a cut foam pad. I’ve written a lot of measurements on it with a black marker, so that you might be able to create your own.
(You may need to click on the photos to enlarge and see it clearly, but hopefully you can read all the numbers. The measurements are all in CM).


The foam can be cut with scissors, but ideally, this foam is best cut with single-edge razor blades and a skilled, steady hand. The razor blades dull very quickly, but if swapped out often, can carve out nice, even beveled edges on the padding and minimize the amount of sanding you’ll have to do later. Lucky for you, the padding will be covered in fabric later which can hide a lot of irregularities.
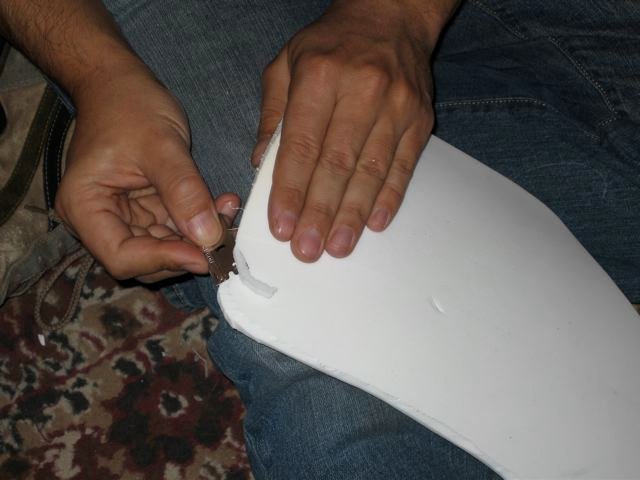
Slicing off the edges to create beveled edges
Once the padding is cut, you’ll need to add a small strip of foam (approx 2cm x 24cm) to make the neck roll area larger. Just cut a straight strip out of the same 1cm thick foam, cut the ends and the sides at an angle so that they slope down and then glue it in place with Barge. Put some weight on it (but not too much weight – the foam has memory) and let it dry overnight before proceeding to the next step.


Sanding:
It’s time to round off all of the edges of the foam padding. To do this, use a wet piece of medium to coarse sandpaper. You need the sandpaper to be wet so that you don’t just tear up the foam. You may want to practice on a separate piece of foam until you get the hang of it, but soon you should see the foam start to round off as you sand it (remember to keep wetting the piece of sandpaper, and to replace it with a fresh one if it starts to fall apart).

The sanded smooth neck roll padding
Once you’ve got your padding all sanded, you should add those reinforcing strips of cotton mentioned earlier (the pad strengthening tips for the vintage pads above all still apply here). Gluing the fabric on to reinforce the pad is easier in this case since you can simply glue it on to the foam before you cover it with fabric. These will help keep the rivets from pulling through from wear.

Strips of cotton glued on to reinforce rivet sites
I usually put some weights on the Barge-glued pieces for a few hours to make sure they keep flat and they’re on there good.

So far so good. Now we need to cover the padding in fabric. What you want is 100% polyester. The Rawlings pads had grey fabric, but it doesn’t really matter since it’s all going to be sprayed black anyway.
For the fabric, you’ll want to cut two pieces that are about an inch larger all around than the foam piece. That’s because these two pieces will eventually be sewn together and you need some overlap.
To sew the pieces, flip them inside out so that when you’re finished, the edges of the fabric will be hidden inside the cover. Leave the fabric unstitched along the neck roll area, leaving plenty of room, so it won’t be too difficult to get the foam inside. You should now have a fabric pouch that you can slip the pad inside. You’ll now have a fabric covered shoulder pad that is open at the neck. The neck roll area will get sealed when you add the vinyl there.
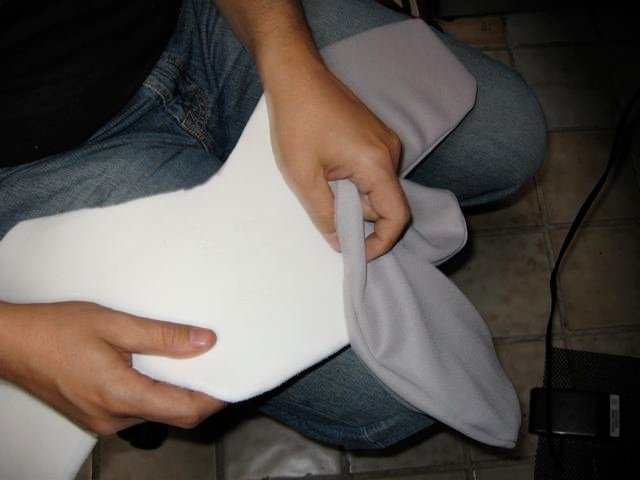
Dressing the padding up in its polyester cover
Speaking of which, you’ll need a strip of vinyl (the originals were white and then painted black, but you might as well use black vinyl in case any of the paint rubs off – you’ll be spraying it black later either way). The vinyl is sewn over the open neck roll area of your pad, overlapping the fabric and sealing the whole thing up.
Depending on your skills and what kind of sewing machine you have access to, you may need a pro to do this part. Sewing through foam and vinyl without bunching up the foam can be tricky. I brought mine to a leather and shoe repair shop. I had them do the next part too:
Now you’ll need to put some stitching at the edges of the foam to mimic the look of the original Rawlings padding. This should be done at the same time as the neck roll since it will also require a special machine that can sew through thick, dense foam.
Here are some dotted lines that represent where the stitching should be. This is the underneath side of the pad, but it doesn’t really matter since the stitching goes through both sides.

otted lines show wear the heavy-duty stitching and vinyl strip should go
Time to paint. Any old black paint should work for the fabric, but you’ll really need a special paint for the vinyl on the neck roll unless you want it to be sticky forever and rub off on things.
As for attaching the plate to the pad, and the pad to the jacket, refer back to Karol’s original tutorial linked at the beginning.
SOME FINAL ADVANCED TIPS
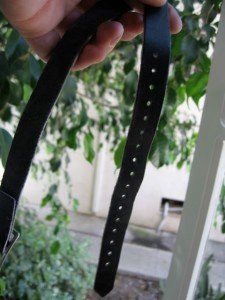
Karol mentions in his tutorial the leather strap/small belt that attaches underneath the armpit when wearing the pad. Since we know that for the movie they used a Rossi boot strap for this, you may want to consider having a custom strap made for extra screen accuracy. I took a real Australian Rossi boot strap in to my local leather shop and had them make me two copies, one for using under my shoulderpad, and one for using on the back of my knee pad (the knee pad will be the subject of another tutorial).
Here are some closeup photos of an actual Rossi boot strap. (I’ll check out the exact measurements and post them soon, I don’t have the strap in hand right now).
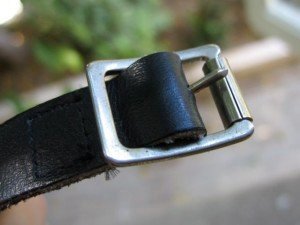
We haven’t talked much about the actual plastic shoulder plate that is attached to the pad. It is now very hard to find a screen accurate shoulder plate. And it seems that even after using Karol’s spotting guide (linked near the top of this tutorial) people still have trouble finding the right one. Well, that’s why Karol and I made a resin replica of this plate. At the moment, we are sold out of these plates, but we have talked about doing another run of them in the near future.
The final pad attached to my jacket:
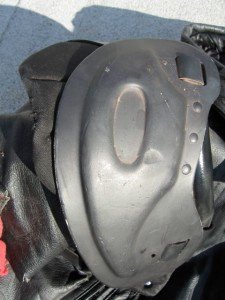

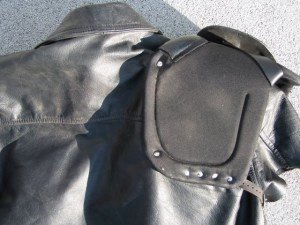
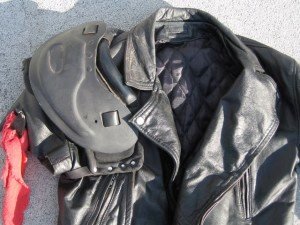
Here are a couple of photos of the whole outfit. They’re a bit out of date now as I have since made a few tweaks and improvements, but they’re the best I’ve got at the moment. (Pics taken by Adam Chilson)


